Back in Mod #20, I replaced the front turn signals and positioned them off of the headlamp ears. Joker Machine had sent me a pair of clip ons to try and in order to do so, they need to be installed on the forks. This requires replacing the stock OEM headlamp ears since they cover the entire upper portion of the forks. Since I needed to do this, I decided to lower the turn signals first. In this post, I'm completing the final step - replacing the ears.
I set about researching for a set of ears and I have to be honest, aside from the fact that most of them are over $200USD, I found a lot of them (not all of them) to be over-engineered and not the greatest looking. I wanted something simple; very simple. On a fluke, I checked Amazon and found a seriously nice set for under $20 (shipping was free). Incredible, really, and the price is cheap enough that, if I want, I can swap them out later and not lose my shirt. They are the SMT MOTO Black billet Aluminum Headlight Fork Mounting Brackets For 35mm/39mm/41mm Forks which I will be reviewing and installing. They arrived from California (Pasadena area, I believe) in a little over a week.
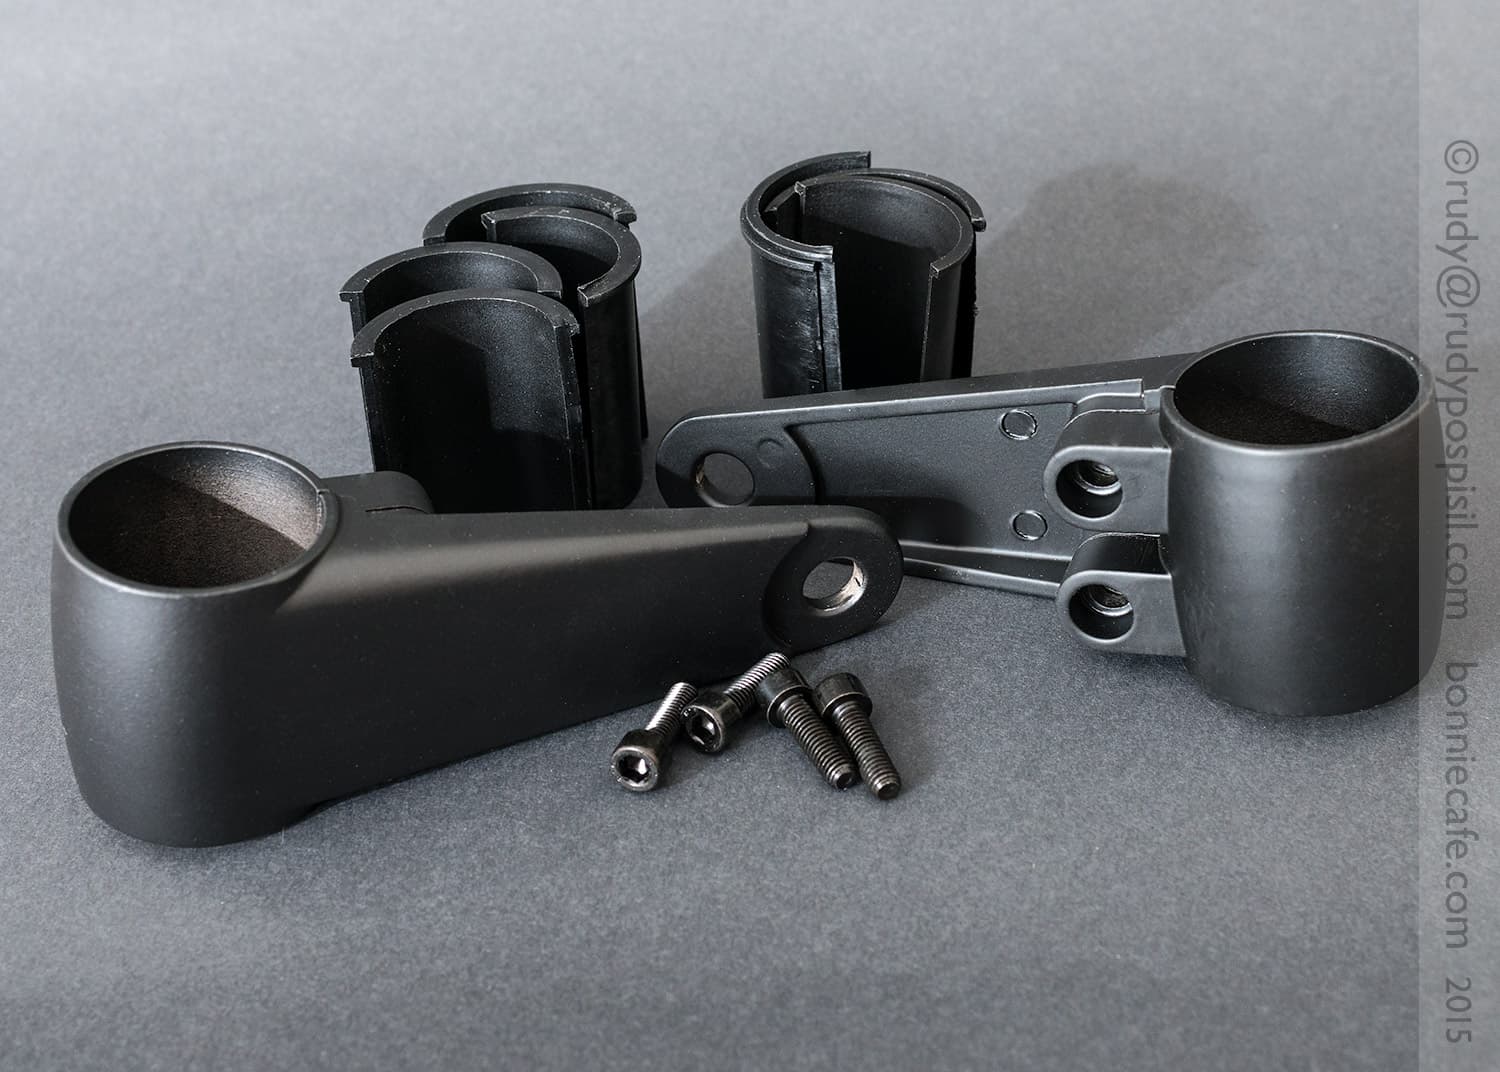
 Unpacking the SMT MOTO 41mm aluminum headlamp ears, shims, and hardware for a Triumph Bonneville T100 motorcycle. Bonnie Café.
The kit consists of two brackets, mounting hardware (2mm socket head bolts), and shims for 35mm and 39mm forks. The quality seems pretty good. They're made in China, which can be a hit or miss proposition, especially at this price point, but this is a very simple, non-critical (for the most part) product so I have high hopes. However, the sockets in the bolt heads were off-center.
 SMT MOTO 41mm aluminum headlamp ears, shims, and hardware for a Triumph Bonneville T100 motorcycle. Bonnie Café.
The 2014 Triumph Bonneville T100 has 41mm forks, so you won't need any of the shims. The bare bracket is 41mm.
Installation is a fairly simple process. The handlebar assembly, as a whole, needs to be removed from the forks so that the stock OEM headlamp ears can be removed and the new ones installed. We'll be removing the entire handlebar assembly as one unit still coupled with the top yoke (aka triple clamp). There is no need to remove the clutch, brake, or throttle assemblies.
 The fork top bolt and fork right clamp bolt of the top yoke of a Triumph Bonneville T100 motorcycle. Bonnie Café.
The top yoke is held in place by the steering stem nut and a left and right fork clamp bolt. Note: the fork caps (holding in the fork springs) do NOT need to be touched.
Make sure to cover your tank and also your front fender with a thick mat or towel, otherwise you'll scratch them in no time.
Start by releasing the headlamp from the stock OEM brackets. Place the mounting hardware back into the headlamp so as not to lose them. This requires a 13mm socket.
 Removing the headlamp assembly from the stock headlamp brackets of a Triumph Bonneville T100 motorcycle. Bonnie Café.
FUN FACT: Headlamp refers to the assembly. Headlight, on the other hand, refers to the actual beam of light emitting from the headlamp.
Now, loosen the fork clamp bolts on the left and right sides of the yoke using a 8mm allen key. No need to remove them. We just need to release the grip they have on the forks.
 Loosening the right side fork clamp bolt of a Triumph Bonneville T100 motorcycle. Bonnie Café.
Now let's tackle the steering stem nut. This baby is on tight. You'll need a 30mm socket. In the photo below, you'll notice that the socket is a 1/2", so I had to adapt it to my 3/8" wrench which made it a bit tougher to crank. Also, I'm using a 3" extension. This was necessary in order to clear the tank as I rotated the wrench.
 Removing the fork top bolt of the top yoke of a Triumph Bonneville T100 motorcycle using a 30mm socket. Bonnie Café.
 Removing the fork top bolt of the top yoke of a Triumph Bonneville T100 motorcycle using a 30mm socket. Bonnie Café.
Once the stem nut is off and the fork clamp bolts loosened, lift the handlebar assembly and yoke off of the forks. Be gentle; you'll need to do a little shimmying back and forth. More than likely, you'll have the assembly resting on the headlamp so make sure that you have a padded towel in place. The stock OEM ears can now be slid off of the forks, past the fork caps that you didn't have to remove.
 Removing the handlebar assembly off of the forks of a Triumph Bonneville T100 motorcycle. Bonnie Café.
The following photo shows the left ear. Each side will have a mounting collar - watch out because it'll drop out onto the floor quick easily. Each ear also has a top and bottom seal. I left the bottom ones on the fork by accident which is why you only see one in the photo.
 The stock OEM headlamp bracket, collar, and seal (left side) of a Triumph Bonneville T100 motorcycle. Bonnie Café.
Slide the STM-MOTO ears onto the forks, making sure that left and right are correct.
 Sliding the SMT MOTO headlamp ears onto the forks of a Triumph Bonneville T100 motorcycle. Bonnie Café.
 Tightening the SMT MOTO headlamp ears onto the forks of a Triumph Bonneville T100 motorcycle using a 2mm allen wrench. Bonnie Café.
Attach the headlamp and tighten down the ears with a 2mm allen wrench. As you can see in the photo above, it's a pretty tight fit. You might want to measure, adjust, and loosely tighten without the headlamp in place and then when everything is dialed in, tighten for posterity. I eyeballed it but in hindsight, I wish that I had brought a ruler and grease pencil to measure it out.
The home stretch. Place the yoke assembly back onto the fork tubes. Be careful here. I found that my forks leaned in 1-2mm without the support of the yoke. I had to apply a bit of force to spread them so that I could get the yoke seated back onto them. If you have a fork brace in place, you probably won't have this problem. Finish off by tightening the steering stem nut back on and tightening down the fork clamp bolts. Torque settings are here.
In terms of the turn signals, if you want them attached to these ears, it would be a simple matter of drilling holes. I suspect that the ears would hold up to this fabrication. I used a step drill bit in Mod #19 when I had to modify the Maund bracket in order to mount the Joker Machine tail light to it. That drill bit would work perfect. I'm leaving this open as an option.
Here are photos of everything in place. For less than $20, I'm extremely happy with these ears. Perhaps in six months, the paint will be peeling off of them, who knows. I'll let you know if it does.
 Right side view of the SMT MOTO headlamp ears on a Triumph Bonneville T100 motorcycle. Bonnie Café.
 Front view of the SMT MOTO headlamp ears on a Triumph Bonneville T100 motorcycle. Bonnie Café.
 The left side of the SMT MOTO headlamp ears on a Triumph Bonneville T100 motorcycle. Bonnie Café.
Tools Required: 2mm Allen key 8mm Allen wrench 13mm socket 30mm socket Towels Torque wrench
Company URL: SMT MOTO
Price: $18 - Motorcycle Black billet Aluminum Headlight Fork Mounting Brackets For 35mm 39mm 41mm Forks